Boot From SD Card
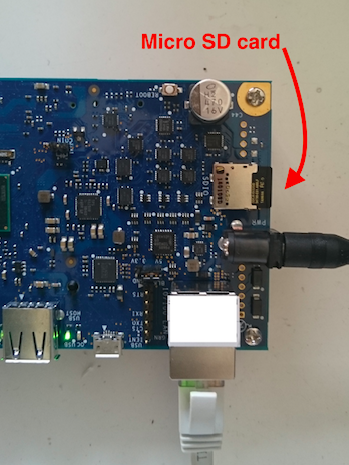
Intel Galileo Gen 2 can boot from a micro SD card. This section explains how to write a Galileo linux image to SD card and boot from SD card.
Getting Image
You can get the Galileo's linux image by following Building Galileo Image on Debian or download it here, built by the authors.
Preparing SD Card
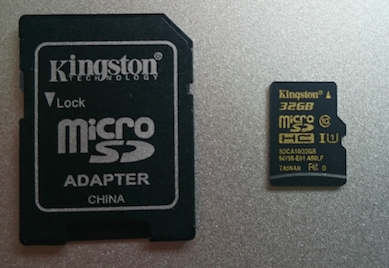
If you don't have a micro SD card reader, get a micro to SD card converter.
We need to format the SD card and make sure it has correct partition before we copy kernel images onto it.
- SD card should have partition type
Master Boot Record(MBR) - SD card should have one partition of type
FAT32
After SD card is prepared, simply copy all five files/folder in the image to SD card
- boot/
- bzImage
- core-image-minimal-initramfs-clanton.cpio.gz
- grub.efi
- image-full-galileo-clanton.ext3
If, for some reason, networking is not availale, you can use a FTDI232 TTL 3.3V cable with an appropriate terminal software, such as PuTTY in Windows, to connect to the serial console of Galileo. When Galileo boots up, you can see the options

select items on the grub menu

and go through the whole booting process to see if there is any issue.

Example: Debian 7.8
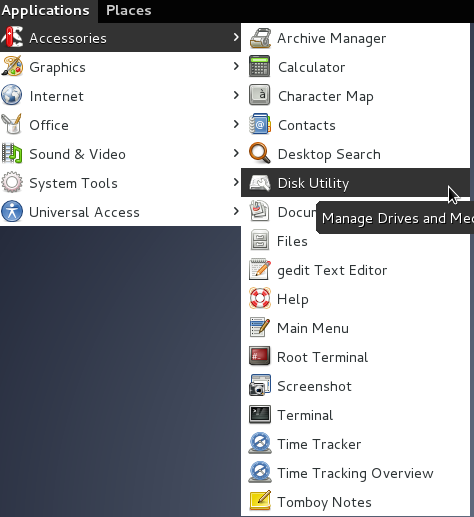
To demontrate how it is done on Debian 7.8, let's use a GUI Disk utility: Applications/Accessories/Dist Utility
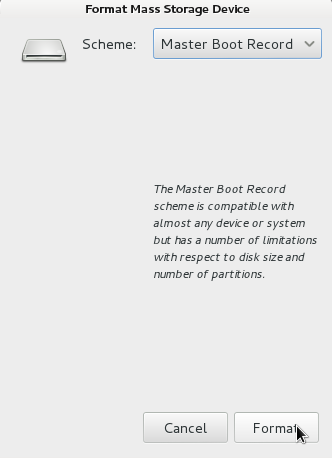
Select Format Drive, and format the SD card into
Master Boot Record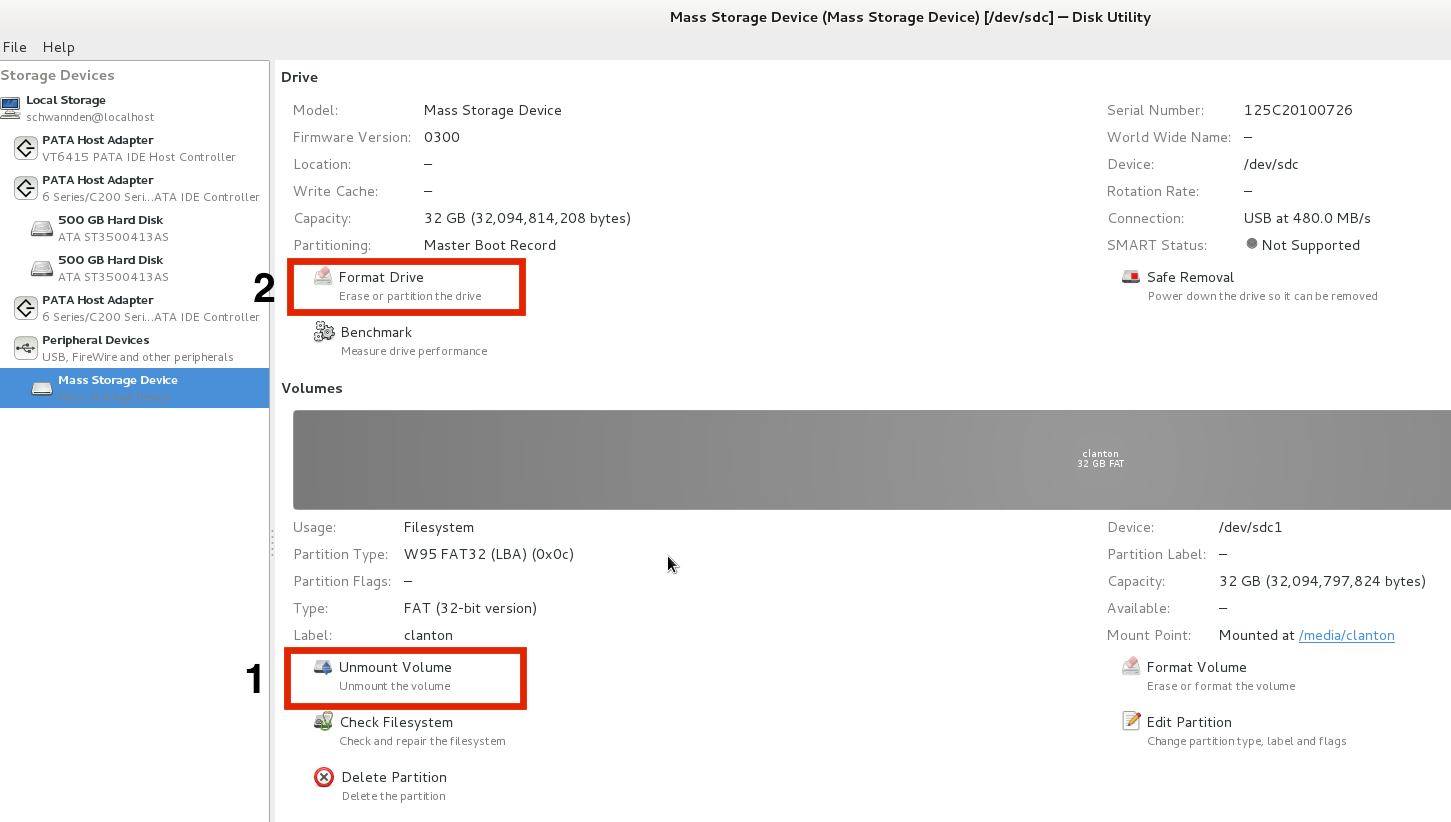
Select Add Partition, then add a
FATpartition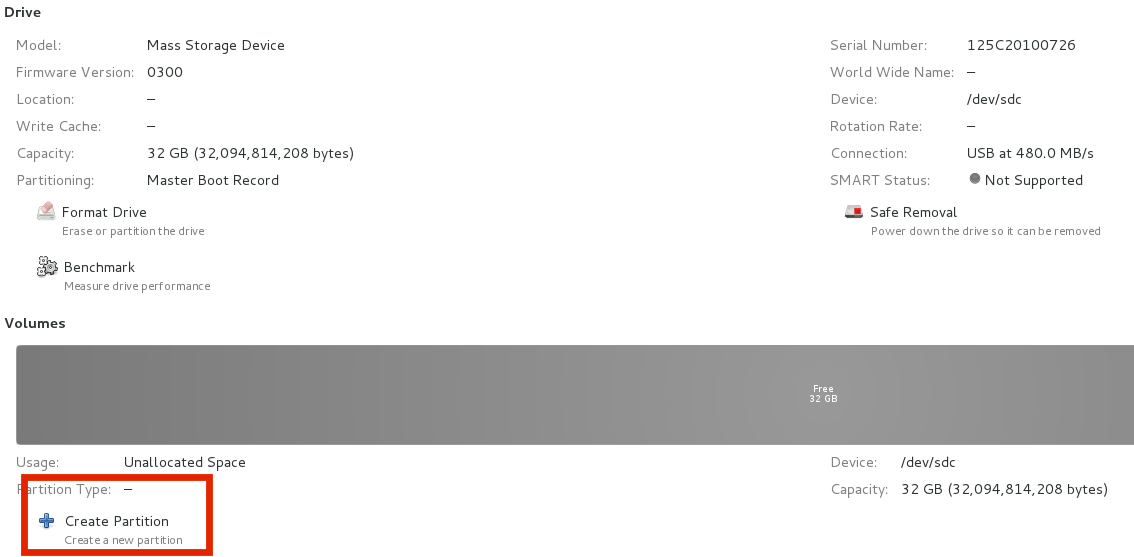
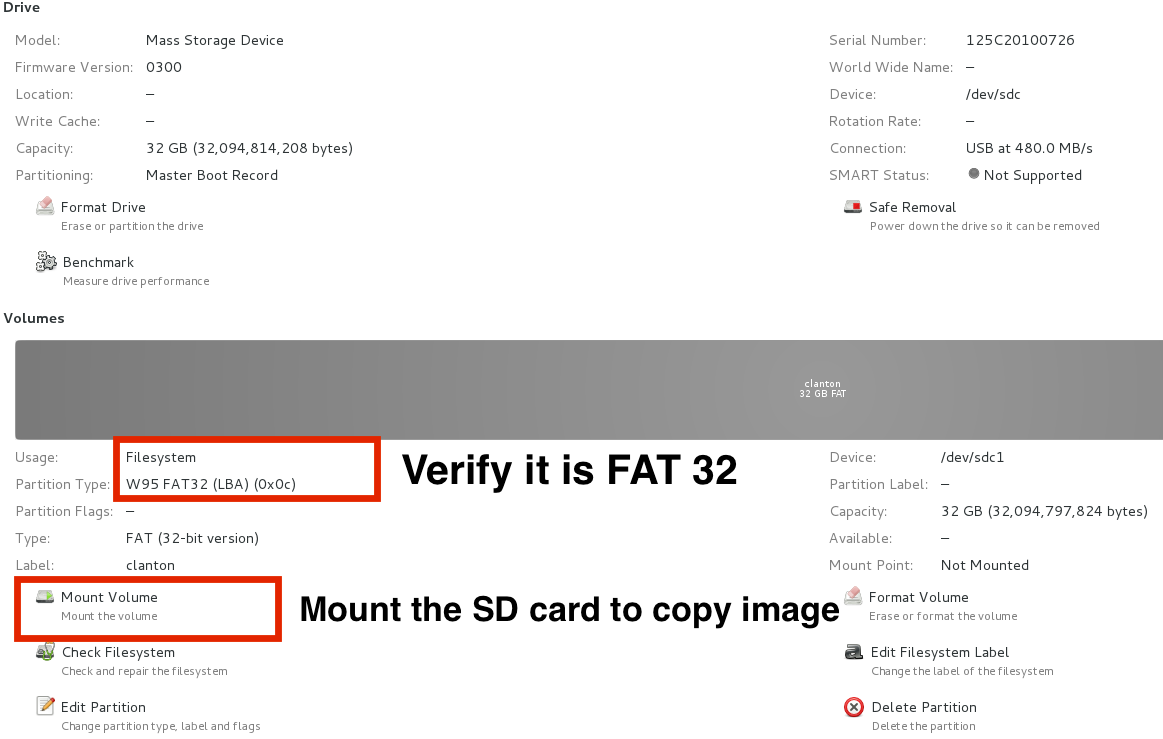
Now you can copy everything to SD card
cp -rL boot/ bzImage core-image-minimal-initramfs-clanton.cpio.gz grub.efi image-full-galileo-clanton.ext3 /media/clantonCF/
Example: Mac Yosemite
Insert your SD card

Open Disk Utility

Format the SD card

Copy files to SD card
